How to Import Bank CSV Files into Microsoft Excel

A comma-separated values (CSV) file is a special kind of file that stores data separated by commas. It’s useful for moving data between programs.
When you download your bank account history, it is often delivered in the form of a CSV.
Unfortunately, it’s not easy to read your financial data in a CSV file. For that, you’ll want to import your data into a spreadsheet program, such as Microsoft Excel.
Getting CSV data from your bank into your Excel workbook is easy if a bit tedious. Follow the steps below, or learn more about Tiller’s automated bank feeds for Excel.
Step 1: Log in to your bank account
From a computer:
- Go to your bank’s home page.
- Enter your username and password.
- Click “Sign In.”
Step 2: Download transactions in an excel file
- Once logged in, click on the account you want the transactions for to access transaction history.
- This may be under the section titled Account Summary, Account History, Account Statements

- Click on the download icon (
 ) or click on “Download”. This may be on the top or the bottom of the page, depending on your banking portal.
- At this stage, you may also need to scroll to pick the desired dates or fill out the Custom Date Range


- On the download pop-up or the Export page, select the options Excel, CSV, or Spreadsheet before downloading the file.

- The file will automatically download to your computer. You can click on it through the Downloads tab in your browser and it will open it in Excel.
Step 3: Cleaning up your bank activity
- Cleaning up will allow your data to be more concise and easier to read. To clean the bank activity, you will need the Power Query Add-in in Excel.
- Open a new window and excel. Click on Data 🡪 Get Data (Power Query)


- Under Choose Data Source, select Text/CSV

- Select the CSV file downloaded earlier, and click on Get Data, then click Next.


- In the file data preview, click on Transform Data or Edit (depending on your OS). Your data will then show up in the Power Query Editor, where you can clean it up.
- To delete any redundant columns, select the column header, right click for a drop-down menu, and click on Remove Columns.

- To rename the columns, right-click on the column header for a drop-down menu and click on Rename. Then, proceed to assign a relevant name to the header.


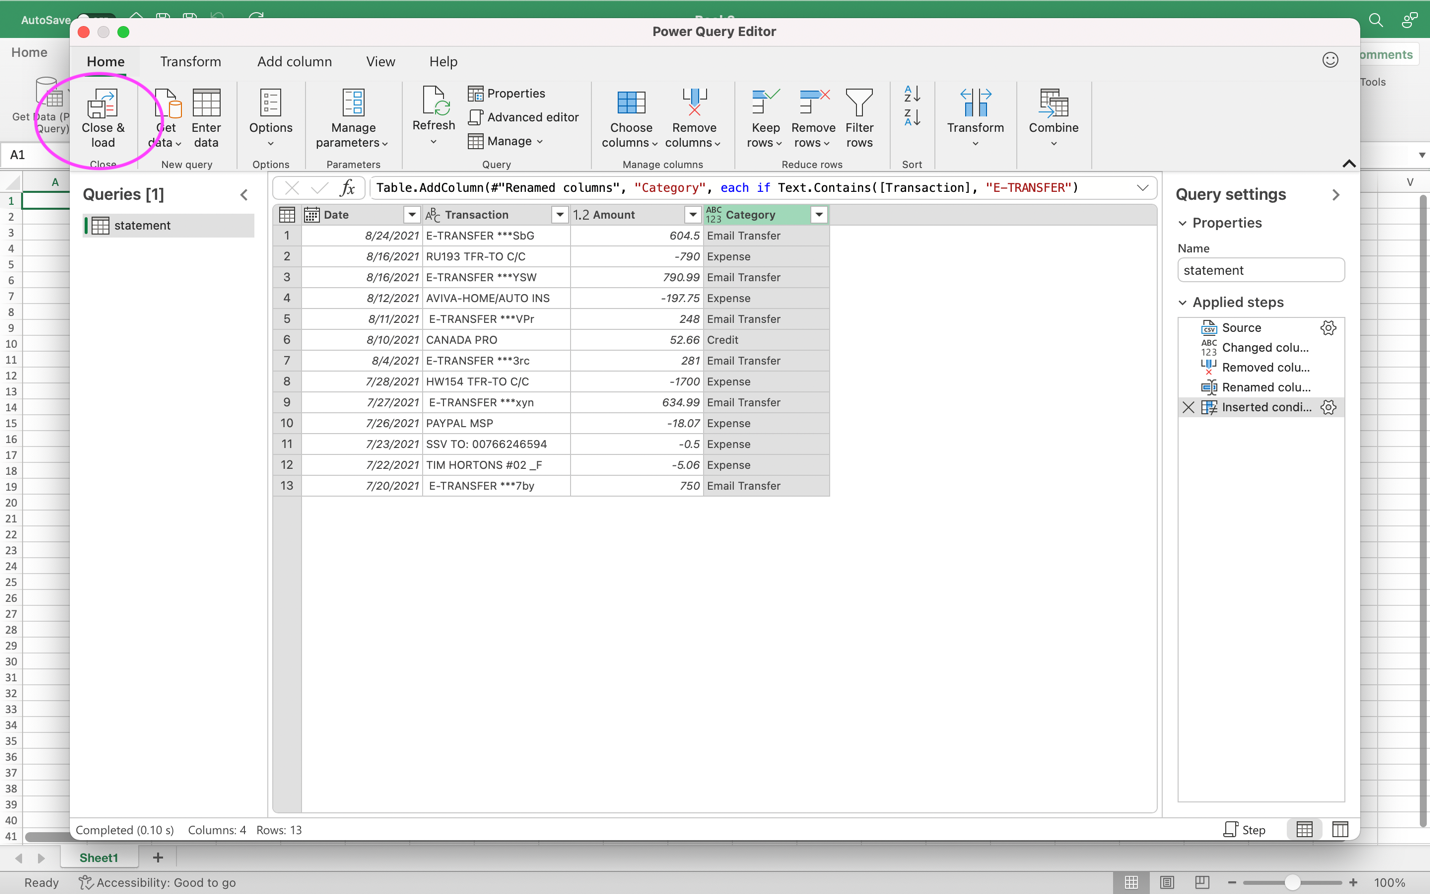
- Next, we will use the Conditional Column command, which is quite useful in cleaning up and organizing bank data. Click on Add Column 🡪 Conditional Column and a dialog box will appear asking you to assign conditions/clauses to organize your data.

- In the dialog box for Conditional Column, insert the column name (in this case it’s Category), and then assign conditions through clauses.
- For the purpose of this data set, if the Transaction column contains the value E-TRANSFER (case sensitive) then the category assigned to it should be Email Transfer. We click the Add clause button to create our next rule.
- For the second rule, If the Amount column is less than 0 then the category assigned to it should be Expense.
- For the second rule, If the Amount column is greater than 0 then the category assigned to it should be Credit.
- If none of these clauses are true, then, we set the Else value to Miscellaneous.
- You can continue to add as many clauses to the column as required, and then click OK. A new column will appear next to your data set as per the rules set in the Conditional Column.


- At this point, you can Close and Load the Editor, and all your data will appear on an Excel worksheet.

Step 4: Loading information on a PivotTable
- Click Insert 🡪 PivotTable

- Click OK in the dialog box


- You can now use the PivotTable Fields to organize your data however you desire, by placing fields in the areas mentioned. Following is an example of how data can be structured.


